Showing posts with label sewing. Show all posts

Tuesday, September 18, 2012

Keepin' Those Baby Legs Warm

Even before I got pregnant, I so badly wanted a pair of baby leg warmers. But first I had to get me some baby legs. Well, I have the baby legs now, but sadly Little Dude is not a fan...especially when the leg warmers are clearly for a Little Dudette.

Luckily for me though, my besties in California just had a Little Dudette.

Here's how I made these adorable little things.

Start with a pair of long socks. The length is dependent on how long the baby leg is that you're trying to cover. I prefer they scrunch up a bit, so I bought knee high, tweenager sized socks. 

Then you just cut 'em up.


Turn the right sides together of the foot portion that you cut out and sew on one side only.


Then flip her right side out again. 


Now, fold her in half. This is going to be your ankle cuff.


Stick the long portion of the sock inside the cuff, then sew around (the only difficult part of this whole project). 


Flip the cuff down and boom.


And my super compliant model, Little Dude, is less than thrilled...okay, so he doesn't look pissed, but trust me!


Try it. I did three pairs while Little Dude took his afternoon nap.

<3 dani

Monday, September 26, 2011

New Cover for a New Tushy

I'm lucky enough to have great friends that are hooking me UP with baby gear.

When I got my lovely changing table I had to do two very easy things. First, spray paint it white. Next, find a cover for the pad. Easy right? Totally.


Except pad covers are crazy expensive...at least in my frugal opinion.

So instead of buying these, I found some inexpensive fabric and made my own. I hope this tutorial does justice to the simplicity of this project.

You'll need:

1 yd fabric
pins
scissors
sewing machine
a changing pad to cover ;-)

First I laid out my yard of fabric over my pad (inside out of course).


Then I wrapped it up and pinned it down.


I literally pinned it into the pad so the pattern didn't get off-center on me. I'm all about symmetry. I'll take these pins out once I get my sewing edges pinned up nicely. Above shows the pins down the middle. Below shows the pins along the edges. 


The corners were a tad difficult, but I just pretended I was wrapping a present and bam, got it. Make sure to pin right up next to pad here because this is the part that you'll actually sew.


I trimmed off any excessive fabric to prevent bunching. 


I left the back open like a pillow sham.


Once you've got the two ends pinned snuggly, you can take out the pins on the rest of the pad. You'll have to take the fabric off using the flap you left on the bottom. It gets tricky here, but take it sloooow and steady.

Once it's off, the rest is easy. Just sew a line on either pinned end and done. Flip it so the inside is now in and finagle it back on the pad.


Nice, right?

As for the rest of the changing table fix-in's. The top baskets are from Michael's. 40% + 15% (love the teacher discount) off totaling $15. The bottom baskets were a buck each at the Dollar Store.

The rest of the nursery will be revealed soon!

<3 dani

big shout-out to my friend Tyler who subtly reminded me how much I love blogging my crafty-ness. 

Saturday, January 29, 2011

Not Your Old Home-Ec Apron

In 7th grade, my mom took me to JoAnn Fabrics to pick out material for my very first sewing project; an apron. Not my best work. I've made more aprons since then -- because, let's be honest, they are super simple -- but none as awesome as this one!


First, huge shout out to Mychel at Trendy Accentz! She created this easy-to-follow tutorial and is the reason I was able to create this pretty apron for my sis-in-law.

You'll need:

Scissors
Coordinating Thread (which I never have)
Sewing Machine
Iron
1 1/2 yards of Main Fabric
1 yard of Accent Fabric *(or more, read below)
Patience

I started by washing and drying and gently ironing my fabric. I know you might want to skip this part, but take it from me, you gotta' do it.

Then I folded my main fabric down the middle, laid it on the floor and put an actual apron over the top, also folded down the middle. This'll serve as your pattern.


Of course my plain Jane apron doesn't have the flair of my finished project, so I had to improvise. I grabbed an a-line skirt and added it to the mix.


I cut around all of this leaving a solid two inches for a double hem.


Cut small slits, about 1/4 inch deep and 1 inch apart, in the curved edge of the fabric. These slits will help the curved edge of the fabric lie flat when you fold it. Thank you eHow!

After cutting the apron out, I cut out the ties. Two for the neck, two for the waist. I only show two total here, but you'll need four. The neck ties are were about 2-3 inches wide (honestly, just eyeballed it) and the waist ties are about four inches wide.
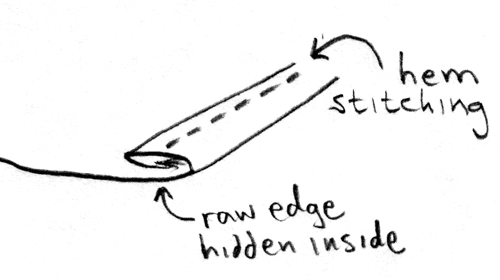
  
Then I went straight to the ironing machine. Again, I know some of you want to skip this part, but I promise you this will save you effort in the end. I ironed a double hem (twice folded edges) so that my sewing would take less time (no pinning). Iron everything that will have a visible edge.


I sewed the hem around the entire apron, then I cinched and attached my ruffles.


Here's where my plan falters a little. *I should have purchased more accent fabric than I did. I could have made my ruffles along the bottom edge better if I had more length to work with. To make those cut little ruffles, I simply hand basted the top edge (the edge that will connect with the apron) and cinched the fabric up adding ruffles and being sure to keep the fabric long enough to still match the width of the apron. You can tell I wasn't too aware of this making my top ruffle. PS - if you need help with the ruffles go here. Her tutorial is far more comprehensive than mine.


For the ties, all you have to do is fold the fabric in half, wrong sides together and sew down the open edges. Leave  yourself a little bit of room to pull the fabric through to the right side. Attach them with a straight stitch.

Notice I'm not giving you a lot of measurements? That's because I didn't use any. I used my 'real' apron (i put real in quotes because it kinda suggests this new apron isn't real, but that's not the case at all) for guidance and I looked at Mychel's pictures often too. As long as your edges look nice, you can make this little thing any way you'd like.

Here's the finished beauty. At one point I wished I wasn't giving this away!


<3 dani

Check out the creative places where I LINK UP

Sunday, November 28, 2010

Goodwill is Good to Me

Whenever I tell people I get most of my things from thrift stores, I usually get this response: "I don't know how you do it. I never find anything."

Here are some tricks for those of you who are serious about becoming a savvy thrift shopper:

Turn it into a hobby. This way you're making frequent, yet brief visits to the local shops. You begin to notice trends this way.

Find out when they get major shipments and when those things make it to the floor. This may sound obsessive, but you just might have to be obsessive to get the good stuff.

Think outside of the box. If you find something that is 90% perfect, try to figure out a way to make it work. Sometimes a little paint can make it awesome.

Know your brands. If you're shopping for clothes, know how the fabrics of your favorite brands feel. I can usually make it through a 30ft aisle in 3-6 minutes. Swear. I just touch and go. Sometimes a piece trips me up and I have to check the tag, but I'm generally spot on. So if you know what color, texture and style you're looking for, you cut your searching time significatly.

Have a plan. I never go into a thrift store without my list. We're always looking for something, right? You'd hate to forget exactly what that something is and just pass it by. This'll help you avoid any repressed hoarder tendencies too ;-)

Last week, I visited one of several thrift stores I frequent looking for jeans. Of course I brought my 'need/want' list with me. Good thing too. I didn't find any jeans, but I did find some brown boots. I had to think a little bit outside of the box, but hot damn these are cute now.

The after:


The Before:


The flowers are so not me. I'm a less is more kinda girl and those decals are just too much. While at the store, I tried to confirm that their removal would be easy. Once I did that, those babies came home with me. Sure, that's a little risky, but for under $10, I couldn't pass it up.

I hope you have as much luck as I do thrifting.

<3 dani

Monday, October 11, 2010

T-Shirt Extravaganza

When I was eleven, I got a karaoke machine for Christmas. I love singing, I really do. I've done a handful of musicals and I even wore my Sound of Music tee today. As much as I love it, I wanted to exchange the karaoke machine for a sewing machine. Sad thing is, aside from one Home-Ec class, I'm clueless on that thing. My specialty is...um...sewing a straight line.  Just today I got a package of no-sew adhesive to fix my dining room curtains, but this evening everything changed.

Last week was homecoming where I teach and, as usual, game day is school spirit day. It was insanely warm on Friday, which made wearing a sweatshirt a terrible idea. Trouble was that my school t-shirts are all XLs. I'm no skinny mini, but an XL just makes me feel frumpy. I wore one anyway and end up tying it up a little in the back. By the end of the day, I had counted at least ten students with the same...ahem...idea.

I decided there was no better time than now to alter my tees. I fail pretty regularly when using my sewing machine, but knowing that I could buy a new shirt was a small comfort.

This evening, I did not fail. Huge sewing win, huge.


I started out by finding a shirt that fits perfectly. Then I laid the big tee out inside out and front up. I matched the little tee up at the neck and shoulder line. Then I pinned the bottom of the big tee together. My hope was that pinning the bottom would prevent them from slipping.


I absolutely dread pinning before sewing. I would rather something come out crooked than have to concentrate on pinning, but I thought this project was short enough to just suck it up and do it.


After pinning the bottom shut, I traced along the edge of the little tee with pins, pinning the sides together (and creating an outline for me to sew next to). I went ahead and did the sleeves too because I thought it would look silly to have a slim shirt and floppy sleeves.


I had the right thread color, but once again my laziness took over when I saw that my bobbin was already full of thread. Sure it wasn't the right color, but no one is going to see that...I hope.


I finished sewing all the way around. The pic above is with one side trimmed. I mistakingly turned it inside out before trimming the edges and it looked terrible. Horrible. Bad. In fact, it was so ruffled and pinched up around the edges I considered throwing in the towel. But I pushed on and to my surprise, after trimming the edges it looks juuust fine. Fine enough for a t-shirt that is.


And here are the finished pieces. I'm pleasantly surprised. I can actually wear this to school. In total, I spent about 45 mins from pinning to flipping right side out.

We all have a few shirts that we wish fit a little better, try this out. Big thumbs up! Let me know if you'll try this or have tried it before and how it turns out!

<3 dani

LINKIN UP