Tuesday, December 14, 2010

Bulb Ornament Wreath - Ish

I say 'ish' because I could easily add another package of ornaments, buuut it might be a while before I head back out to the madness that is the mall. Even my Dollar Store was a shopping disaster.

Is it wrong that I have a sense of ownership over the Dollar Store that I frequent? In my head, I caught myself saying to the herd of shoppers, "Don't even act like you guys love this place. I know better. I'm here all the time and I've never seen you before!" Possessive? Absolutely.

Oops, little sidetracked there. Anyway, about the wreath. I love it. And for roughly $5, it makes my crafty heart pitter patter. Check the little guy out.


Here's whatcha need:

Tons of ornaments (when you think you've got enough, get more)
Wreath Form
Ribbon
Hot Glue
Paint


And it wouldn't be Dollar Store material if it didn't have some personality


Just in case you don't know if you want to hang it from the top...or the side. That's my Dollar Store...always givin' me options.

Okay, then I painted the wreath form in case my covering wasn't sufficient. Black seemed to do the trick.


Then I just started gluing. If I was smart, I would have looked at a tutorial that one of my bloggy friends created, but nope, too cool for that.

This is about the time I discovered I didn't have enough ornaments. I pulled what I could from our tree (no ones looks at the back anyway tee hee), then ran downstairs and grabbed some old ones. Not the right color. Good thing I didn't put the black paint away.


Eventually, I came up with this.


Not quite circular. Kinda pretty though. In a non-circular kinda way.


What's the likelihood that I actually get more ornaments to fill this little guy up?

<3 dani

Loads of creativity where I LINK UP


Sunday, December 12, 2010

Traditional Shmaditional

I can't say that I love the traditional holiday style (hopefully I haven't offended all of you with that statement). Don't get me wrong, I love tradition, but the typical holiday decor really makes me cringe. The red, the green, the holly, the multi-colored lights...ugh, it's just too much. And really people, just because something is Christmas themed, doesn't mean it belongs in your house. </rant> ;-)

Here, let me explain what I mean in regards to my house (before all of my followers disown me). I love the ornaments and decorations The Hubs and I have collected throughout our lives. Some pieces are sentimental, some are funny, some remind us of places we've lived or visited. But just because they mean a lot, doesn't mean they fit into my decor. Right? However, they're all too meaningful to just leave in a box.

It is because of that, we now have three fully decorated trees in our house. Take a look, it makes perfect sense!

The first tree, the focal tree, lives in the main living space and is themed black, silver and green-- the new addition this year. Simple and elegant.


The next lives in the family room downstairs. This is the fake, traditional tree holding all the ornaments from our childhood plus all the ornaments we've gotten each other over the last six years. Simple red, green and white lights.


The Hubs' R2D2 and C3PO.


A mouse in a stocking...pretty sure this was my mom's at one point. 


Anyone who grew up in the 80's has at least one brass, engraved ornament.This one's from 1984.


Love my coffee...


For years, The Hubs has wanted a globe. I've yet to find one worth buying...mostly because I'm cheap, but I did find this huge ornament globe at Restoration Hardware a few years ago.


And my Pup's paw print. We hang it at the bottom so he can see his artwork. (Yeah, I definitely need children soon ;-)


And the last tree lives on the sporty side of the basement family room. This is a fake, mini-tree that holds all the sports related ornaments we've collected. 


How many trees do you decorate? And do you dig the holiday traditional decor or are does the modern decor appeal to you?

<3 dani

ps - I do have an excuse for the bad photos...my camera is still on my bro-in-law's fridge. Oops. So, the Blackberry was workin' double duty today.

Saturday, December 11, 2010

Paper, Glitter & Glue, Oh My!

Hello friends...I'm alive. Hard to believe considering I've left you hanging for weeks without posting. But, I'm back with a cute, easy, cheap project for the holidays.

A few weeks back I showed you my holiday mantle...which looked eerily similar to my fall mantle. In between grading papers and coming up with lesson plans, I finally made time to create my real holiday mantle. 

Here's what I came up with (and a mini tutorial on my sparkle trees).


Some tree trimmings, extra black, silver and green ornaments, a string of lights, pine cones, candlesticks, a snowman, a few sparkle trees and done.


The sparkle trees were made out of necessity. Because that wall is so tall, I have to have something with a lot of height on the mantle, or the size of the wall just eats it up. Usually, the bigger the item, the more expensive the purchase. I didn't even bother checking stores for a piece to fit here, instead I bought some poster paper and glitter.

Here's everything you'll need:

Glitter
Poster Paper (two sheets)
Hot Glue
Mod Podge (or this)
Scissors

First, I rolled my poster paper into a cone. This was the most difficult part of the project. Holding it together proved to be a challenge, but once you get it where you want it and glue it down, you're smooth sailing. You can almost see my hot glue seeping out the edges. Better safe than sorry. No one wants an exploding glitter tree ticking time bomb on their mantle.


You'll notice that the edge isn't level and that's fine. You'll just trim it down until it stands straight.


I made a couple more little ones, then covered with adhesive and began to glitter. I added adhesive in sections to make it a little more manageable.

Here's what I came up with:


So, for the cost of two sheets of poster paper (like $2), you can create these purdy trees.

<3 dani


There's loads of creativity where I LINK UP

Sunday, November 28, 2010

Goodwill is Good to Me

Whenever I tell people I get most of my things from thrift stores, I usually get this response: "I don't know how you do it. I never find anything."

Here are some tricks for those of you who are serious about becoming a savvy thrift shopper:

Turn it into a hobby. This way you're making frequent, yet brief visits to the local shops. You begin to notice trends this way.

Find out when they get major shipments and when those things make it to the floor. This may sound obsessive, but you just might have to be obsessive to get the good stuff.

Think outside of the box. If you find something that is 90% perfect, try to figure out a way to make it work. Sometimes a little paint can make it awesome.

Know your brands. If you're shopping for clothes, know how the fabrics of your favorite brands feel. I can usually make it through a 30ft aisle in 3-6 minutes. Swear. I just touch and go. Sometimes a piece trips me up and I have to check the tag, but I'm generally spot on. So if you know what color, texture and style you're looking for, you cut your searching time significatly.

Have a plan. I never go into a thrift store without my list. We're always looking for something, right? You'd hate to forget exactly what that something is and just pass it by. This'll help you avoid any repressed hoarder tendencies too ;-)

Last week, I visited one of several thrift stores I frequent looking for jeans. Of course I brought my 'need/want' list with me. Good thing too. I didn't find any jeans, but I did find some brown boots. I had to think a little bit outside of the box, but hot damn these are cute now.

The after:


The Before:


The flowers are so not me. I'm a less is more kinda girl and those decals are just too much. While at the store, I tried to confirm that their removal would be easy. Once I did that, those babies came home with me. Sure, that's a little risky, but for under $10, I couldn't pass it up.

I hope you have as much luck as I do thrifting.

<3 dani

Black, Silver and Green All Over

Time is flying by and I'm jogging to keep up. I loathe physical activity, but I'm doin' alright so far.

Exciting weekend here: tree cut and up, lil shoppin', lots of food, few decorations. I know, how the heck do we have time, right?

We had two very clear goals in mind when we decided to go cut down our tree: 1) get to the farm when it's not busy; and b) find one taller than me. No tape measure, we're just wingin' it. Turned out pretty alright.


Besides the leaning topper, which The Hubs calls and I quote "it's natural tilt," I dig it. 

I still love the black and silver theme, but this year we added green. There's already so much green in the rest of the common areas, it just made sense to tie it in...besides that's what lazy decorator does.

Considering this is the largest tree we've ever had, we are a little light on the trimmings. Who knew a 9 1/2 ft tree would need that many ornaments? 

Preparing our mini-Thanksgiving dinner and decorating the tree mentally and physically exhausted me, so for now I basically just added to our Fall Mantle.


Of course I'll be adding and changing things as the month goes on, but I'm definitely on the right track.

Here's The Hubs doin' all the dirty work. <3


The dining room chair just wasn't cutting it this year.


Also, it turns out I'm totally allergic to this tree. I had wear my winter gloves the entire time we decorated. Kinda funny really. Very National Lampoon's.

<3 dani

Monday, November 15, 2010

Finally, A Pennant

It may not be a Cubbies Pennant, but gosh darn it, it's a pennant.

As I mentioned here, I got a new job, thus a new classroom and four very institutionally bare walls. The Hubs and I have several team pennants in the basement and I love showing school/team pride, but I'm not going to steal from our sporty family room and I'm certainly not going to go out and buy new ones.

I bought some felt, printed stencils, glued 'em on and DONE.


You'll need:

1 rectangle sheet of stiff felt
1 8x11(ish) piece of regular felt (for the border and lettering)
hot glue
letter stencils (or print some letters using Word and cut 'em out, I'll show you how to use  them in a minute)
scissors

Use a pennant you already have as your stencil. Mine was too big for the felt I had, so I just modified it.


I traced it, then cut.


Yeah, I totally switched out the felt on ya. I made two and planned on showing you both, but somehow deleted a majority of the blue pennant's photos. Sleepy.

Then I added a border on the left edge. You'll notice the glue spot near the top. This is when I switched to hot glue. Apparently, fabric glue seaps right through felt.


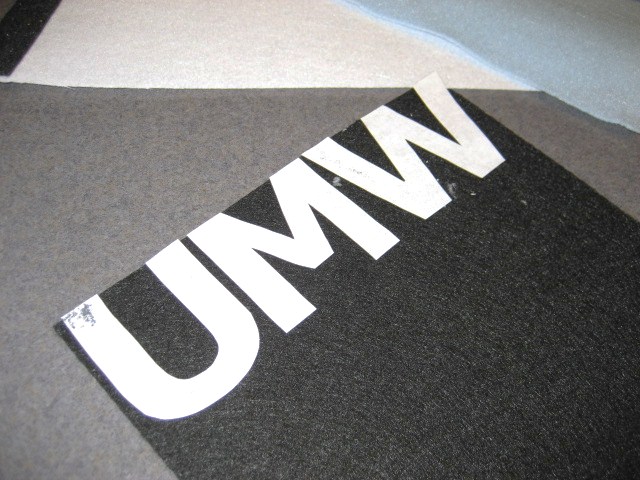
Stencil time. I printed some letters; no stencils to be found. Be sure to use a simple font. Those curly q fonts would be murderous to your hands.


Once you've cut them out, flip them over and glue them on to your felt *with hot glue ;-) Cut 'em out and glue them right side up (paper side down) onto your pennant.


Yay. Pennants for the classroom.


and here they are in my room!


What teams/schools would you make a pennant for?

<3 dani


The Coast-er with the Most...er Somethin'

Yes, this is another post on coasters. If you missed the first one, here it is. But this one is totally different...with the exception of the coasters and the crafting...tee hee.

While redoing our bedroom, I realized that our ugly, old, wine-stained coasters weren't really appropriate for our sophisticated, adult master bedroom. New coasters weren't an option. Have you ever priced those things?! Seriously, they hold condensation, not little drops of gold. The Hubs would say "Don't you respect the wood enough to spare it from water, no matter the cost?!!" Well, he has a point, but I'm doin' it for free.


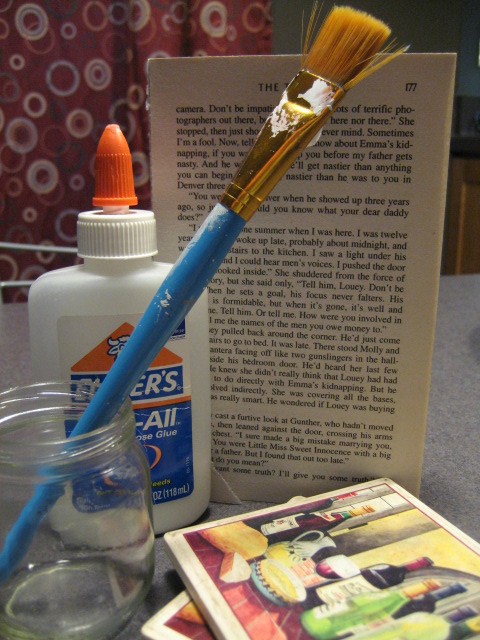
I started with a couple of old ceramic coasters (I had these on hand, but I see similar ones every visit to Salvation Army), left over book pages from this project, homemade mod podge, sealer, and a brush.


I made the adhesive mod-podge-wannabe by adding a little water to regular Elmer's Glue. That particular bottle was completely usable. The top had irreparably dried up, so I just cut the bottle and poured the glue into a baby food jar, then added the water. Simple.


Then I ripped up the book pages. The main reason I did this was to conceal the content of the book. I'd rather not be tempted to read a poorly written FBI fiction/fantasy book every time I set my glass down.


After I ripped the pages into little pieces, I began gluing them on in no particular order or pattern.


When they dried, I sealed then varnished. I have no idea if I did that in the proper order, but as long as it's waterproof, I'm happy.


And here they are. Much more mature (and functional).


<3 dani